Descent on Mtb: Tips to improve driving and be safer
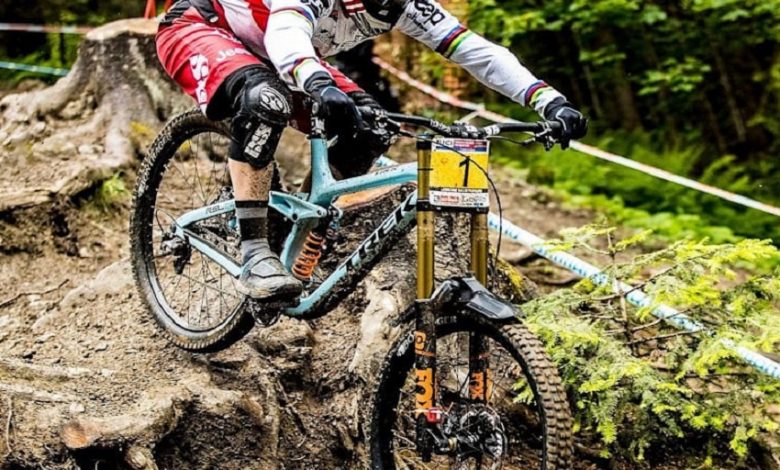
Having a good driving downhill allows us to save energy and seconds, above all to be safer and because also fast. The keys to improvement are different. Let’s face it straight away: the descent is the best part of every mountain bike ride, but also the most frightening and difficult phase to master. So, if you are looking for a way to improve your technique, here, you will find eight easy and valuable tips to follow the next time you are on the trails. Ready, let’s go with the Moongoose mountain bike.
Descent in Mtb, guide and advice: memorize a gesture
A certain gesture or a speed maneuver will come to us much more naturally if we first try it thoroughly on a path we know well. Motor memory is a very important ally of the biker to be able to perform a certain maneuver, such as a trajectory to be changed at the last moment. We should be able to master it to the fullest and to do so. The key is to start exercising where we feel most confident. Only then should you try a different trail. Choosing a path of the right length and a walking time that is suitable will allow us to remain efficient from a psychophysical point of view for the entire duration of the segment.
Choosing a segment that is too long would bring with it two problems: the first, that with the passing of the minutes, our performance would lose its effectiveness; the second – not negligible – concerns long transfers to get back to the top. A 4-minute descent, in fact, requires a 20-minute ascent. Once identified, that particular segment will become our gym and on that, we will try to practice as we deem most appropriate and profitable.
Speed and lightness
A fundamental technique for every biker is to let the bike move under you. It is all too easy to hold the handlebars when you are afraid, but this will only increase the chances of your falling. Try to be stable by letting go slightly with the arms and legs that will follow the bike in a soft way. Your limbs are the best suspensions you can have. Use them wisely.
Look ahead
We’ve all come across situations that took us by surprise on a descent, disrupting our fluid pace and thus losing precious flow and speed. In essence, we never look far enough on the path and are not adequately prepared for what may surprise us, so even if it may seem trivial, remember to always look ahead and anticipate your trajectory. This will help you keep your speed up while avoiding hateful obstacles.
When going downhill, turn the brake levers
The setup of your brake levers has a real effect when the slope goes negative. Many riders keep the levers very inclined downwards. This can be good uphill. In any case, when you pedal hard and long, even off the saddle, it is absolutely unproductive when you want to push hard downhill due to the exaggerated pressure on the wrists.
Try turning the levers slightly upwards, with a neutral angle of the grip. This setup may seem strange to you at first, but as the descent begins, your wrists will be in a stronger position, allowing for more control when braking.
The saddle? It lowers!
Modern technology is doing everything to make the downhill phase more comfortable and performing. The biggest game-changer of recent times is the dropper post. There are many brands and models on the market, which basically act in the same way: to allow controlled lowering of the saddle by simply pressing a lever on the handlebar. Don’t have a dropper post? No problem, just remember to bring a multi-tool with you, lowering the saddle before any serious descent. It will only take you a couple of minutes to reap the rich rewards of this new approach. Check this Mistakes You Make While Riding Indoor Cycles – Avoid These!
Repetitions until you reach the ideal setting
At this point we are, we have our own trail on which we will try to improve our skills. We just have to start understanding what we are doing wrong and correct it. First, we will have to start repeating our segment, trying each time to improve the fluidity of our distance. Going step by step, initially focusing on one aspect at a time, is the best way. A functional tactic could be this: first, try to increase the travel speed, then the braking point. Once we feel we have reached our maximum on these dynamics, we can finally stop looking at feeling from the usual point of view. We will start looking for advances and supports on the various curves, but to do this, it will be necessary to forget our usual track, shifting the focus to the entire path,
The guideline must be that which allows us either to gain time in the entry or to have greater speed in the exit. Always think that each curve is the daughter of the previous one and the mother of the next one, so even a possible mistake could cost you on the following curve what it did not cost you immediately. The basic idea and this is even more true on a path we do not know, is that the wide line is always preferable because if we are wide and there is an impediment in front of us, it is much easier to tighten the line. Shorten the road without losing too much fluidity. On the contrary, going from internal to external is almost always very tiring and forces us to reset our speed.
Descent, video tutorials to study
For those who have an action camera available, they could find in this a valid ally to make this upgrade. In fact, filming yourself or being filmed in the descent section will allow you to thoroughly analyze your session, studying where you might find alternative lines so as to try them the next time you go up that descent. Seeing the screen in the video would simplify your work because it would allow you to have a different perspective and therefore see the image “with other eyes.” Furthermore, if the video you are going to see will be made by a second person following you, you will also have the opportunity to view and investigate any setting and positioning errors on the bike.
Positioning is another focal point that many tend not to consider. “I can’t do that passage” and “On the steep I’m afraid” are often phrases deriving from a wrong position on the bike that shifts our balance points and therefore makes us approach the obstacle that we have to overcome in the wrong way. Also, in this case, being filmed will allow us to have a different view and perspective, highlighting any errors to be corrected.
A friend-hare: essential to improve!
Once you have entered the perspective of looking for the alternative line, the next step will be to do it on all the descents: you will thus become masters of your path and you will want to try to use the skills trained even on trails that you do not know. An excellent exercise, certainly training from a technical point of view, is what some call “blind chase” or “hare hunting”: the exercise is very simple, how effective and consists in having some friend accompany you who is on the descent.
Your level – or even a little bit stronger – is on an unfamiliar trail. At that point, you will ask him to act like a hare and you will try to follow him. All these exercises obviously require a good personal judgment as a premise. It would be counterproductive to start with things that are too difficult. You may also like to read, https://houseilove.com/how-to-tighten-bike-brakes-quick-and-easy-tips/

