How to Prepare for a Windsurfing Adventure: Your Ultimate Guide to Riding the Wind with Confidence

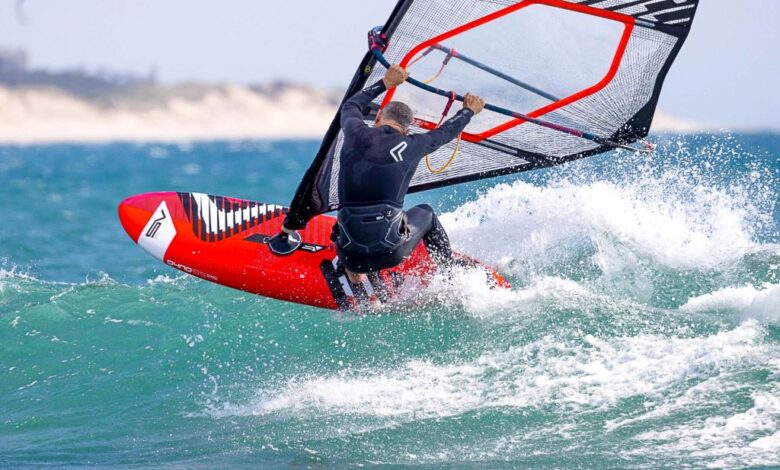
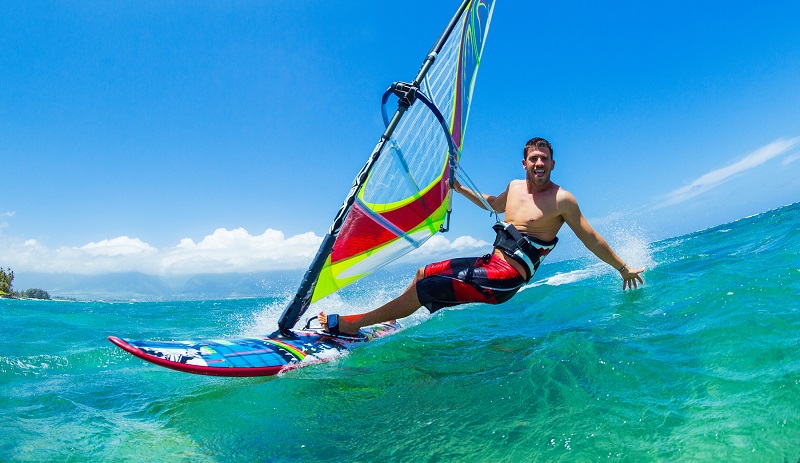
The board skims across the water, propelled by nothing but the wind in your sail. Your heart races as you lean into the breeze, feeling the power of nature beneath your feet. Then, a gust hits, your balance wavers, and suddenly you’re tumbling into the waves. Sound familiar? You’re not alone. A 2026 survey by the American Windsurfing Association revealed that 65% of first-time windsurfers feel overwhelmed by the sport’s learning curve. The difference between a frustrating flop and an exhilarating ride? Proper windsurfing preparation.
Windsurfing is more than just balancing on a board—it’s a dance between you, the wind, and the water. Without the right gear, knowledge, and mindset, even the most athletic beginners can struggle. However, those who take the time to prepare—physically, mentally, and logistically—find themselves hooked after just one session. The secret isn’t raw talent; it’s understanding how to harness the wind and water with confidence.
This guide will walk you through every step of preparing for a windsurfing adventure, from choosing the right gear to mastering basic techniques on dry land. You’ll learn how to read the wind, select the best beginner spots, and avoid the common mistakes that leave newbies soaked and frustrated. Whether you’re planning a tropical getaway or hitting your local lake, these tips will ensure your first time on the board is as thrilling as it is safe.
Why Most Beginners Struggle (And How to Avoid It)
Windsurfing looks effortless when you watch seasoned sailors glide across the water. However, the reality for beginners is often a mix of excitement and exasperation. A 2025 study by Windsurfing Magazine found that 78% of new windsurfers quit after their first few attempts because they underestimated the importance of windsurfing preparation. The biggest mistakes? Choosing the wrong equipment, ignoring wind conditions, and skipping the basics on land.
For example, many beginners grab the smallest board they can find, thinking it’ll be easier to maneuver. In reality, larger, wider boards offer more stability for learners. Others head out in strong winds, assuming it’ll make the experience more thrilling, only to find themselves overpowered and struggling to control the sail. The key to success isn’t brute strength—it’s understanding how to work with the wind, not against it.
Additionally, windsurfing is as much a mental game as a physical one. Those who prepare by visualizing their movements and practicing balance on dry land progress far faster than those who jump straight into the water. The goal isn’t to avoid falling—it’s to learn how to fall safely and get back up with confidence.
Expert Insight:
“The ocean doesn’t care if you’re a beginner or a pro,” says professional windsurfer and instructor Mark Angulo. “What separates the two is preparation. The more you know before you hit the water, the more fun you’ll have once you’re out there.”
Step 1: Choose the Right Gear for Your Skill Level
Your windsurfing gear can make or break your experience. Beginners often make the mistake of renting or buying equipment that’s too advanced for their skill level. The right setup should prioritize stability and ease of use over speed or performance.
Essential Windsurfing Gear Guide for Beginners:
- Board:
- Size: Start with a long, wide board (250–350 liters). The extra volume provides stability and makes it easier to balance.
- Type: Look for a beginner-friendly board with a daggerboard (a retractable fin that helps with upwind sailing).
- Material: Epoxy or polyethylene boards are durable and forgiving for learners.
- Sail (Rig):
- Size: A 3.5–5.0 square meter sail is ideal for beginners. Smaller sails are easier to control in light winds.
- Type: A freeride or beginner sail with a mast foot extension (allows you to adjust the sail height as you learn).
- Material: Dacron sails are more forgiving and durable than high-performance Mylar sails.
- Mast and Boom:
- Aluminum masts are heavier but more durable and affordable for beginners.
- Adjustable booms allow you to customize the sail’s position as you learn.
- Wetsuit or Rash Guard:
- In cooler waters, a 3/2mm wetsuit provides warmth and protection.
- In tropical climates, a rash guard protects against sunburn and chafing.
- Harness and Life Jacket:
- A waist harness helps you connect to the sail without straining your arms.
- Always wear a coast guard-approved life jacket, especially as a beginner.
Pro Tip:
Rent gear before buying. Many beach resorts and windsurfing schools offer rental packages that include boards, sails, and safety equipment. This lets you test different setups before investing.
Step 2: Learn the Basics on Dry Land
Before you hit the water, familiarize yourself with the fundamentals on dry land. This will save you time, frustration, and energy once you’re windsurfing.
Key Skills to Practice:
- Rigging Your Sail:
- Lay out your sail, mast, and boom on the ground.
- Attach the mast to the sail and insert it into the mast foot on the board.
- Connect the boom to the mast and adjust the height so it’s at chest level when you’re standing on the board.
- Tighten the downhaul (the rope that tensions the sail) until the sail is smooth and wrinkle-free.
- Stance and Balance:
- Stand with your feet shoulder-width apart, centered over the board.
- Keep your knees slightly bent and your core engaged.
- Practice shifting your weight from your front foot to your back foot to simulate steering.
- Uphauling the Sail:
- Stand next to the board with the sail lying flat on the water.
- Grab the uphaul rope (attached to the mast foot) and pull the sail out of the water in one smooth motion.
- Practice this on land to build muscle memory.
- Steering and Turning:
- Pointing Upwind: Lean the sail forward and shift your weight to the front foot.
- Bearing Downwind: Lean the sail back and shift your weight to the back foot.
- Tacking (Turning into the Wind): Practice the motion of stepping around the mast while keeping the sail stable.
Beginner Windsurf Tips:
Use a land simulator (a board on a grassy area with a sail) to practice balance and steering. Many windsurfing schools offer these for beginners.
Step 3: Understand the Wind and Water Conditions
Windsurfing is all about harnessing the wind, so understanding its behavior is crucial. The wrong conditions can turn a fun session into a frustrating (or even dangerous) experience.
How to Read the Wind:
- Wind Direction: Use a wind indicator (like a windsock or flags) to determine the wind’s direction. Windsurfers typically sail at a 45–90 degree angle to the wind.
- Wind Speed:
- 0–10 knots (light wind): Ideal for beginners. Allows you to practice balance and steering without being overpowered.
- 10–15 knots (moderate wind): Good for intermediate sailors. Offers more speed and excitement.
- 15+ knots (strong wind): Challenging for beginners. Can be dangerous if you’re not experienced.
- Gusts vs. Steady Wind: Gusty winds are harder to control. Look for steady, consistent winds for your first sessions.
How to Assess Water Conditions:
- Flat Water: Best for beginners. Look for bays, lakes, or protected beach areas.
- Choppy Water: More challenging but great for practicing balance and control.
- Waves: Avoid until you’re comfortable with flat water. Waves require advanced skills to navigate safely.
Expert Review:
“I always tell my students to start in light winds and flat water,” says windsurfing instructor Lea Brasseur. “It’s like learning to drive in an empty parking lot before hitting the highway.”
Step 4: Pick the Perfect Beginner Spot
Not all windsurfing locations are created equal. As a beginner, you want a spot with:
- Shallow, flat water (easier to stand up and less intimidating if you fall).
- Consistent, light winds (5–15 knots).
- Minimal crowds (fewer obstacles and distractions).
- Easy access to shore (so you can take breaks or bail out if needed).
Top Beginner-Friendly Windsurfing Spots:
- Maui, Hawaii (Kanaha Beach): Shallow waters, consistent trade winds, and plenty of rental shops.
- Tarifa, Spain: Known as the windsurfing capital of Europe, with flat water lagoons perfect for beginners.
- Bonaire, Caribbean: Crystal-clear waters, steady winds, and a vibrant windsurfing community.
- Hood River, Oregon: A windsurfing mecca with reliable winds and beginner-friendly conditions.
- Lake Garda, Italy: Flat water in the mornings, perfect for learning the basics.
Pro Tip:
Check local windsurfing schools or clubs. They often know the best beginner spots and can provide gear rentals and lessons.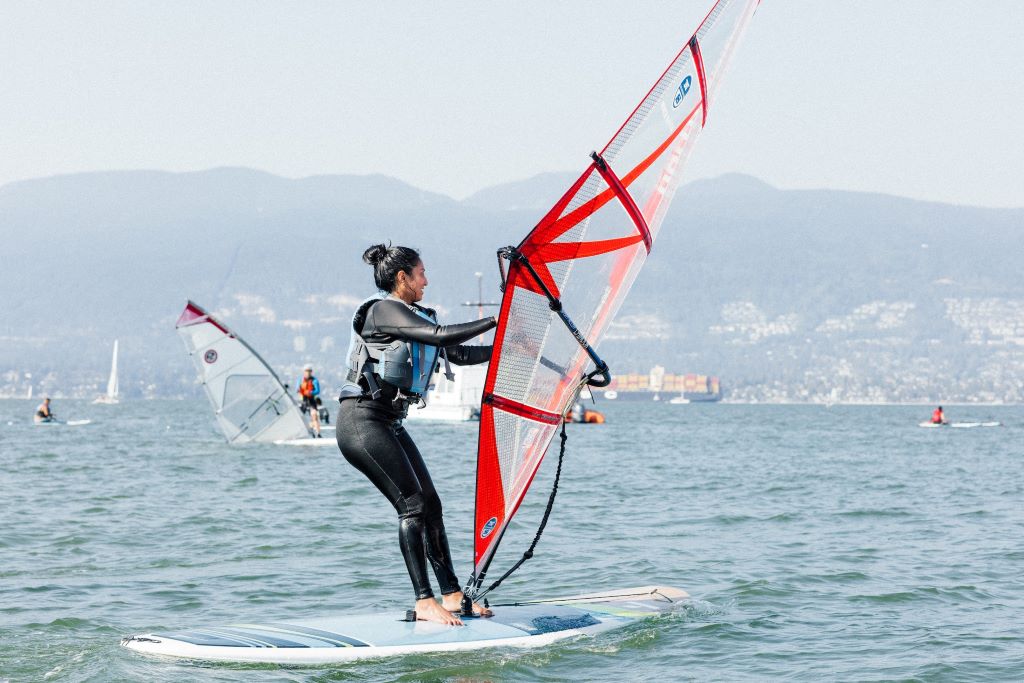
Step 5: Take a Lesson (Even If You’re a DIYer)
Windsurfing is one of those sports where a little professional guidance goes a long way. A 2024 study by the International Windsurfing Association found that beginners who took at least one lesson progressed 50% faster than those who tried to teach themselves. Instructors can help you avoid bad habits, teach you safety protocols, and give you personalized feedback.
What to Look for in a Windsurfing Lesson:
- Small Group Sizes: Ideally, no more than 4 students per instructor.
- Beginner-Focused Curriculum: Should cover rigging, balance, steering, and safety.
- Equipment Included: Look for schools that provide boards, sails, and safety gear.
- Certified Instructors: Ensure they’re certified by organizations like the American Windsurfing Association or International Windsurfing Association.
Real-Life Example:
After struggling to stand up on his board for weeks, Jake took a single two-hour lesson. “The instructor pointed out that I was standing too far back,” he says. “That one tip changed everything. By the end of the lesson, I was sailing across the bay.”
Step 6: Master the Art of Falling (Safely)
Falling is part of windsurfing—especially when you’re learning. The key is to fall safely and get back on the board quickly.
How to Fall Safely:
- Avoid the Sail: When you lose balance, push the sail away from you to avoid getting hit.
- Protect Your Head: Always wear a helmet if you’re in shallow water or near rocks.
- Fall Flat: Try to fall flat on the water (like a belly flop) to distribute the impact.
- Hold Onto Your Board: Keep one hand on the board so it doesn’t drift away.
How to Get Back on the Board:
- Swim to the upwind side of the board (the side the wind is blowing toward).
- Grab the uphaul rope and pull the sail out of the water.
- Climb onto the board from the downwind side (the side the wind is blowing away from).
- Get into position and start sailing again.
Beginner Windsurf Tips:
Practice falling and recovering in shallow water first. It’ll build your confidence and make deep-water falls less intimidating.
Step 7: Pack the Essentials for a Stress-Free Session
Being prepared ensures you can focus on windsurfing—not on what you forgot. Pack these essentials for every session:
- Sunscreen (reef-safe, SPF 50+): Even on cloudy days, UV rays reflect off the water.
- Water and Snacks: Windsurfing is a workout. Stay hydrated and energized.
- Wetsuit or Rash Guard: Protects against sunburn, windburn, and chafing.
- Water Shoes: Protect your feet from rocks, coral, or hot sand.
- Dry Bag: Keep your phone, keys, and wallet safe and dry.
- First Aid Kit: Band-aids, antiseptic wipes, and tweezers (for splinters or sea urchin spines).
- Repair Kit: Duct tape, a multi-tool, and a spare fin screw (in case of equipment issues).
Expert Insight:
“I always tell my students to pack like they’re going on a mini adventure,” says instructor Mark Angulo. “You never know when you’ll need an extra snack or a band-aid.”
Step 8: Warm Up and Stretch Before Hitting the Water
Windsurfing is a full-body workout. A proper warm-up prevents injuries and improves your performance on the water.
Pre-Windsurfing Warm-Up Routine:
- Neck Rolls: Loosen up your neck to prevent strain from looking at the sail.
- Shoulder Circles: Prepare your shoulders for holding and steering the sail.
- Torso Twists: Warm up your core for balance and steering.
- Leg Swings: Loosen your hips and legs for stability on the board.
- Wrist and Ankle Circles: Prevent stiffness from gripping the boom and standing on the board.
Pro Tip:
Do a quick warm-up on the beach before rigging your sail. It’ll make the entire session more enjoyable and less tiring.
Step 9: Know the Rules of the Road (and Water)
Windsurfing has its own set of etiquette and safety rules. Ignoring them can lead to accidents or angry locals.
Windsurfing Etiquette:
- Right of Way: The windsurfer on a starboard tack (wind coming over their right shoulder) has the right of way. If you’re on a port tack (wind over your left shoulder), you must yield.
- Avoid Crowded Areas: Stay clear of swimmers, surfers, and other watercraft.
- Respect the Beach: Don’t rig your sail in the middle of a crowded beach. Use designated areas.
- Help Others: If you see someone in trouble, offer assistance or alert lifeguards.
Safety Rules:
- Wear a Life Jacket: Even if you’re a strong swimmer.
- Check Weather Conditions: Avoid storms, strong offshore winds, or extreme tides.
- Stay Close to Shore: As a beginner, don’t venture too far from land.
- Buddy System: Windsurf with a friend or let someone know where you’re going.
Case Study:
A group of beginner windsurfers in Maui ignored the right-of-way rule and collided with an experienced sailor. “It was a wake-up call,” says one of the beginners. “Now, we always double-check who has the right of way before crossing paths.”
Step 10: Debrief and Improve After Every Session
The learning doesn’t stop when you step off the board. Take a few minutes after each session to reflect on what went well and what you can improve.
Post-Windsurfing Debrief Questions:
- What felt easy or natural?
- What was challenging?
- Did you notice any bad habits (e.g., gripping the boom too tightly)?
- What’s one thing you’ll focus on next time?
Pro Tip:
Keep a windsurfing journal. Note the wind conditions, gear you used, and what you learned. Over time, you’ll see patterns and progress.
Related Topics:
7 FAQs About Preparing for a Windsurfing Adventure
1. How fit do I need to be to windsurf?
You don’t need to be an athlete, but core strength and balance help. Start with light winds and build up your endurance.
2. Can I teach myself to windsurf?
You can, but lessons will speed up your learning curve and help you avoid bad habits.
3. What’s the best wind speed for beginners?
Aim for 5–15 knots of steady wind. Avoid gusty or strong winds until you’re more experienced.
4. How do I know if a spot is beginner-friendly?
Look for shallow, flat water with consistent light winds and minimal crowds. Ask local windsurfing schools for recommendations.
5. What’s the most common mistake beginners make?
Standing too far back on the board, which makes it harder to control the sail and steer.
6. Do I need a wetsuit in warm water?
Even in warm water, a rash guard protects against sunburn and chafing from the harness.
7. How long does it take to get good at windsurfing?
With regular practice, most beginners can sail confidently in light winds after 5–10 sessions. Mastery takes years, but the learning process is half the fun!
Conclusion: Your Windsurfing Adventure Starts Now
Preparing for a windsurfing adventure isn’t just about checking off a list—it’s about setting yourself up for success. By choosing the right gear, understanding the wind, and practicing the basics on land, you’ll build the confidence to enjoy every moment on the water. Remember, every expert windsurfer started as a beginner. The key is to embrace the learning process, laugh at the falls, and celebrate the small victories.
Start small: Pick one tip from this guide to focus on during your next session. Maybe it’s practicing your stance on dry land or researching the best beginner spot in your area. Each step will bring you closer to the exhilarating feeling of gliding across the water, powered by nothing but the wind.
Ready to ride the wind?
Grab a notebook and jot down your windsurfing goals for the next month. What’s the first skill you’ll practice? Share your plans in the comments—let’s inspire each other to hit the water with confidence!
Featured Image Source